Thursday, September 11, 2014

Happy 50th Anniversary


Today is Diversion Showcase's 50th post (Can you believe that? I certainly find it incredible.) This milestone has coincidentally coincided with a very special craft.

At the end of August, some close family friends celebrated their 50th Anniversary. For their 25th anniversary, my grandfather had made them a display with the '25' put together out of quarters. 25 years later, my beloved grandfather has passed away but my mother thought it would be a wonderful idea to do our own version of that display. However, we encountered a number of challenges along the way. My grandfather had had access to an art studio and far more sophisticated tools than my sister and I did so we knew right away that several aspects would have to be modified.

We decided to make the bulk of it with cardstock, instead of wood like my grandfather did, and we would put it in a frame.

All ready to start!
Gathering the materials alone took several days. My sister and I spent an hour at Micheals debating the use of linen gold cardstock vs. gold foil sticker sheets (I know, I know...artists :P ). In the end, we chose the cardstock because it would be easier to manipulate once the delicate letters were cut. The beautiful Bordeaux cardstock we bought from Wallacks; the photo I got printed from Black's photography; and the twenty loonies we got from the bank (sadly, the teller would not deliberately pick out shiny ones for us).

We had considered using 50 cents coins instead of loonies (yes, Canada does still have 50 cents coins although there aren't many in general circulation - bet you didn't know that!) but in the end, we decided to go with loonies for two reasons:
1) Loonies are as close to gold as you can get with coins and since the 50th anniversary is the golden anniversary, it seemed appropriate
2) 50 cents coins are hard to find - we called a number of banks and none of them had any

The first step was to give the loonies a bath. My father plopped all the coins in a bowl of baking soda water and scrubbed them down with a toothbrush.

All clean :)
Next came the cutting of the letters. I am proud to say that I was the one who thought up the genius idea of printing out the stencils backwards and gluing them to the back of the gold cardstock so that when the letters were cut out, they would be gold the right way around. (Originally, I had this complicated idea of printing out the letters the usual way, cutting them out, tracing them out backwards on the back of the cardstock and then cutting the cardstock. It would have been a redundant, overly complicated process.)


Two hours of Bon Jovi and 80s music later...Ta da!
The cardstock we bought at Wallacks was so large, we could easily have made two. We measured and cut it down to size.


Next came the second most time consuming step (the first was cutting the letters). We had to trace the loonies onto the bordeaux card so that we could cut fitted holes for them. After that, we cut a heart shape on top in order to frame the photograph of the couple.


I was surprised to find that gluing everything down was actually the most challenging part of the whole process. Cardstock has this annoying tendency to wrinkle with glue. It took several attempts to get it right. For the loonies, we used rubber cement to ensure a good stick whereas for everything else, we just used gluestick or white glue.

One week from the start of this project later: Voila!


We framed it and hung the beautiful finished product to test the strength of the hook my father nailed to the back of the frame.

This craft was definitely a family effort and we wish the happy couple many more blessed years to come! Happy 50th Anniversary!

Saturday, September 6, 2014

Knotted Pillows

August has been a heavy crafting month. So much so that you, lucky readers, are going to be treated to bonus Saturday posts for the next two weeks. Whoohoo! :)

Turkish head knot (made by Allison & Michelle)
Yellow Celtic knot (made by Nina)
 Blue Modified Celtic knot (made by Andrea & Emily)
Similar to my foray into felting, the impetus for this craft was yet another friend seduced by pretty pictures on the internet and convincing the rest of us to join in the insanity. Knotted pillows are being sold on Etsy for $70-90. At first, I thought that seemed expensive but now, after experiencing first hand how much time, work and material goes into these - that's a steal! :P

My friends and I trolled the internet looking for tutorials but couldn't find exactly what we wanted. Most of the pillows were done with tubular knitting for which we didn't have the equipment. We were going for a cloth sewn tube but none of those tutorials listed all the cloth dimensions. There was a lot of estimation and experimentation involved in this craft and required two intensive sessions to finish. Not for the faint of heart! ;)

My pillow was a blue modified Celtic knot and it has the distinction of being the first successful pillow our group created. Yes, all our pillows were group efforts.

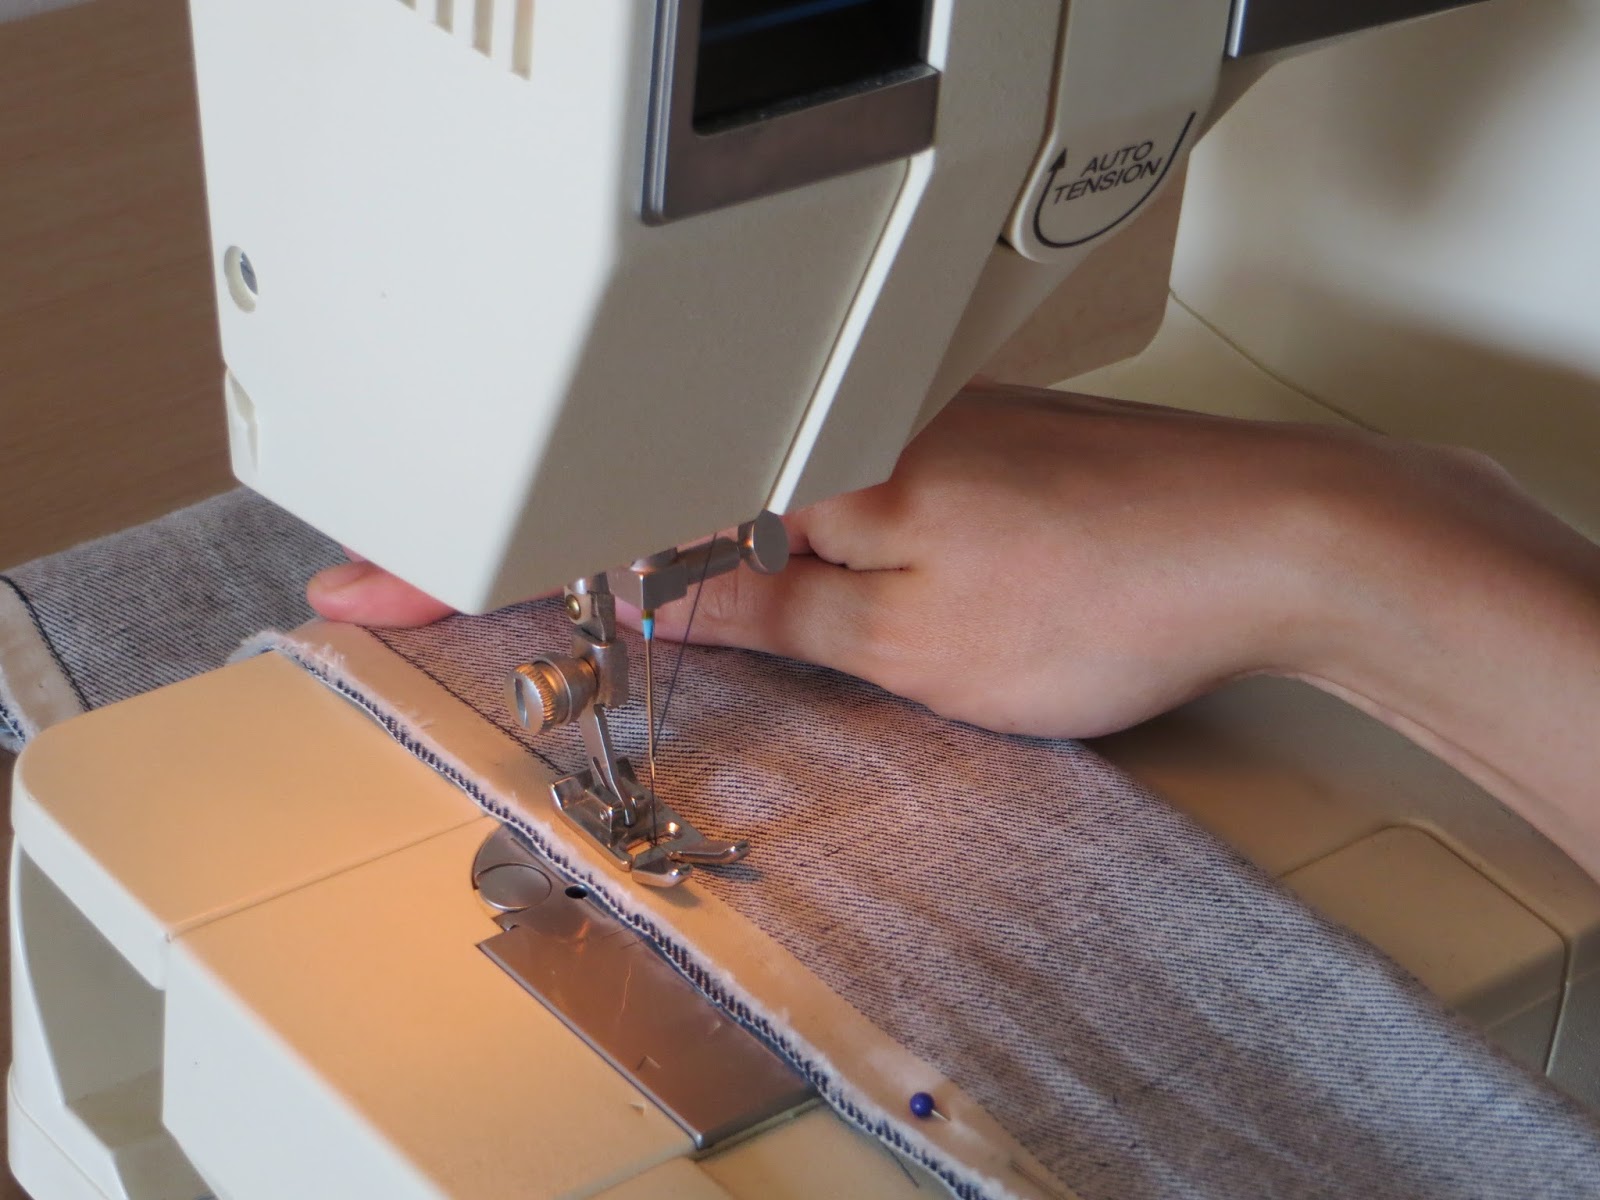
I started with 3 metres of denium linen. I cut a 7 inch wide strip and then sewed the long edges together with an overlap of 1/2 inch. (ie. the final tube had a circumference of 6 inches)

There was a convenient white line for me to follow at the edge of the denium.
This is the tube flipped the right way out - just look at that straight seam!
Next  came the most labour-intensive part: stuffing. Emily and I worked on this pillow together and it took us two hours to get some sort of a technique down. I am so glad that there were two of us - it made the process go so much faster. 

After our 3 m tube was well stuffed, we searched on the internet for a knot to tie. You might remember that I own a Chinese knotting book and originally, I thought to just pick a nice one from there and tie that. Unfortunately, I quickly learned that most of those knots either:
a) Required a longer length of tube than I had or
b) Did not lie flat when tied

That is why I had to resort to the internet. I ended up picking the Celtic knot but I modified it so that my shorter length of tube could still become a decent pillow. (Yep, we discovered that sadly, 3 m is not enough for this project).

It took a fair bit of wrestling get to this point.
Almost there!

I closed the ends by hand with a blind ladder stitch (Thank you, Youtube!) Not the neatest job but good enough. I just need more practice. 

You will notice that I don't have any other sewing crafts on this blog. The reason is obvious - I don't do them. But that may change...

Three hours and a lot of sweat (no real blood or tears...) later: Voila! My poofy cloud-like pillow. It looks great on our ivory leather couch. Our living room is going to look so stylish!

The Front (it took a bit of shaping for it to look just right)
The Back (not as nice but still very interesting)
Allison and Michelle were far more ambitious. They chose a stretchier knitted cloth which ended up thicker than Emily's and my tube when stuffed. They also cut a 7 inch strip but with only 1/4 inch overlap.

Michelle - looking stylish while she works!
Flipping the tube the right way out

I really liked the cloth that they chose. The pattern even matched up where they sewed it together!

Because their tube was thicker, they ended up needing much more length. They had also bought a 3 m length of cloth so they sewed a few more stretches on. Their resulting anaconda of a tube was 9 m long! Stuffing took a week - as you can imagine :P

This is the size of a small rug.
Sewing the ends together with a blind ladder stitch. Allison and Michelle ended up getting more practice at this for obvious reasons. 

It took about half an hour to wrestle that massive tube into a knot and the result is a charming sofa cushion. (Literally, this is thing is the same size as Michelle's sofa cushions.) I think it probably took about 4-5 lbs of stuffing.

They had enough length for a Turkish head knot.

My friend, Nina, joined in the madness on our second pillow crafting day. She chose 4 m of sunny yellow athletic knit. She cut her strip to be 6.5 inches wide and sewed a 1/2 inch overlap.


She completed a full Celtic knot with her tube.

We have all learned how to do the blind ladder stitch thanks to this project.
It took a few days, but we all came away with a pillow each. The Celtic knot was used the most often because it laid out flat and required less length than the Turkish head knot. Because Michelle kept the Turkish head knot pillow, Allison made a second one out of the same cloth and tied it as a Celtic knot. She used only 6 m for this one.

The decor at our house looks so designer now. 

Ivory was an excellent choice for our couch - the perfect backdrop to our accent pillows. 
Emily completed her own pillow with the denium fabric. She also used 6 m of fabric.


Okay, okay... this is what mine was supposed to have looked like but was just too short. Emily's knot is definitely a comfortably sized pillow.

I think I am all pillow-ed out for a little while but I definitely want to do another sewing project in the near future. Skirts and dresses, anyone? :)


Thursday, September 4, 2014

Happy Trails


About two months back, a friend of ours moved to Calgary for a new job. Because he had been an integral part of our church family for several years, our fellowship group worked to give him a proper send off. I, along with my friends Amy and Emily, decided to use this as an excuse for a girl's baking night. :)

With almost 30 people expected to show up for the dinner, we had our hands full. Amy had read on the internet that we could use club soda instead of milk and eggs in the cake mix. I was skeptical but she had tried it out before hand and apparently it works. This was perfect because we knew a few guests were lactose intolerant.  Our main issue was trying to figure out what we were going to make: cupcakes or cake.

The batter was going to be the same either way: cake mix :)
The cupcakes came first.

Fresh out of the oven!
The icing was the best part. I think I did a pretty good job for a novice icer if I do say so myself. ;)


Just look at that professional swirl!
Our friend has worn plaid several times - we looked hard for those cupcake liners! ;)
We thought that using a Pringle and a JubeJube as a cowboy hat was genius - thank you, Pinterest!
We also ended up making a cake. The main reason was that we did not have enough cupcake caddies to carry 30 cupcakes. It turned out for the best though because our 'Happy Trails' sticks all remained together.

Before (baking)
After (check out that golden brown tan)
All iced - you can't even see the cracks! The wonders of make up :)

Those bronze sprinkles are supposed to be a road. Its even got perspective!

We even used cheerful craft tape for the backs of the letters - so DIY.

3 hours later - Voila!
So Brian, we wish you all the best in Calgary! Happy Trails!

Thursday, August 28, 2014

A Little Piece of DNA

This was taken with my iPad camera. Unfortunately, the quality is lacking. 

This week's craft was small, quick and nerdy. I was given a brand new USB by the IT department and I felt that it needed a little something to jazz it up. Since I work in the field of genetics, a chromosome was a natural choice for a charm. A straightened paperclip, a few beads, a length of thread and voila! Can you figure out which chromosome it is? (The level of resolution is 300 and yes, the bands are accurate...relatively.)

Thursday, August 14, 2014

Felted Zoo


Last Sunday, a few of my friends and I met up at Timothy's for an afternoon of crafting. (Thank you to all the indulgent staff who allowed us to occupy one of their tables for 4 hours. We were definitely a source of curiosity and entertainment for the other customers.)

My friends decided to try their hand at felting so I pulled out my stash of unworked wool and needles. After teaching them the basics, we spent 4 hours stabbing at our little balls of fluff, coaxing them into shape. I was delighted to discover that this is a great get-together-and-learn-something- new activity because the basic skills are easy to pick up, its not messy, and the results look good even if you are a beginner.

That happy whale up above was the handiwork of my friend, Emily. Have a look at some in-progress pictures:

First, the body is formed.
It is taking shape.

The white blended smoothly into the blue layer so the smile doesn't look tacked on.


There were four of us and so we each worked on our own project. You can see Emily's whale on the bottom left. The tiny, adorable elephant in the middle bottom is Allison's creation. The fluffy sheep on the bottom right is my friend Maria's handiwork. The unfinished, eye-less giraffe in the back is mine.


This is probably a better picture of our work but it also reveals the remains of our lunch in the back. However, this is the first time that I did crafting in a coffee shop and I can see why it is so appealing.

So again in September, gals? :)